Trash Billing
Northshore Disposal is very excited to announce our new email billing & online payment processing system, Trash Billing!
Trash Billing will allow customers to:
- Make payments on the web
- Sign up for Autopay AND change/update their autopay information
- See their accounts and account balance in real time
- See their last 6 months’ financial history
- Sign up for email billing
- Update their email address on their account
- Sign up for important email notifications like holiday schedules and route changes
Trash billing is now available, and there are no fees to use it!
Please see instructions for how to get started with
Instructions
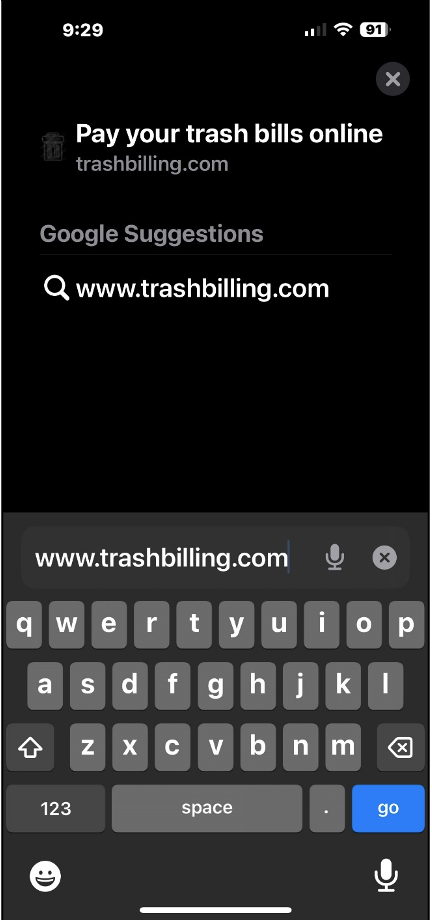
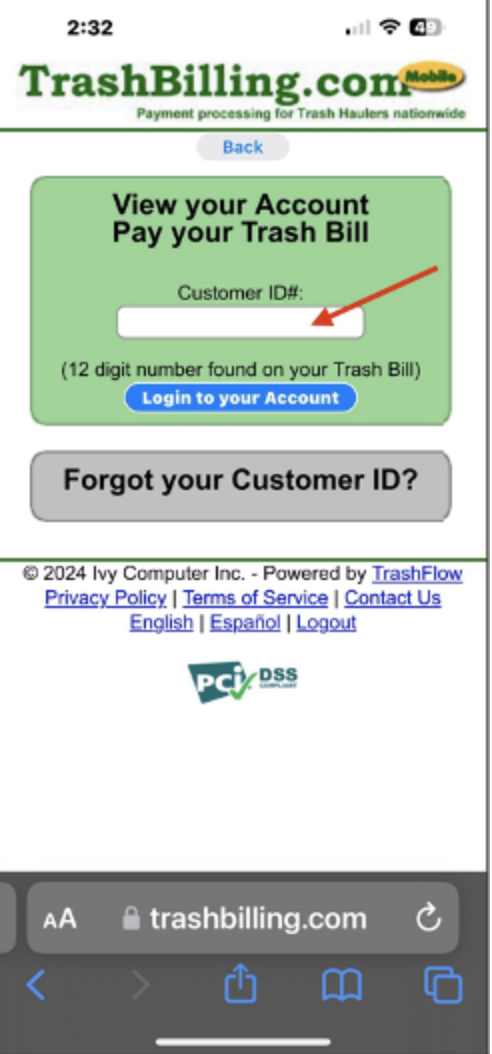
Open a browser on a computer or mobile device and type in www.trashbilling.com (or click the link to bring you straight to the site)
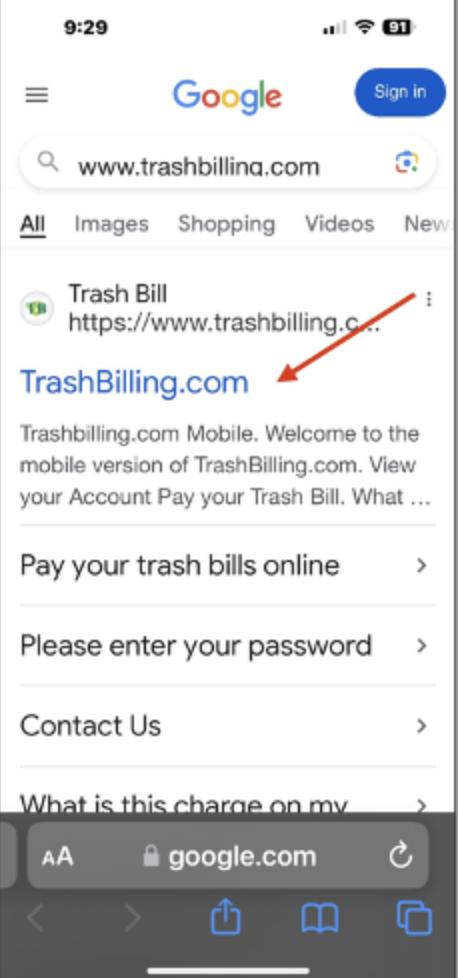
Click on the first option for www.trashbilling.com.
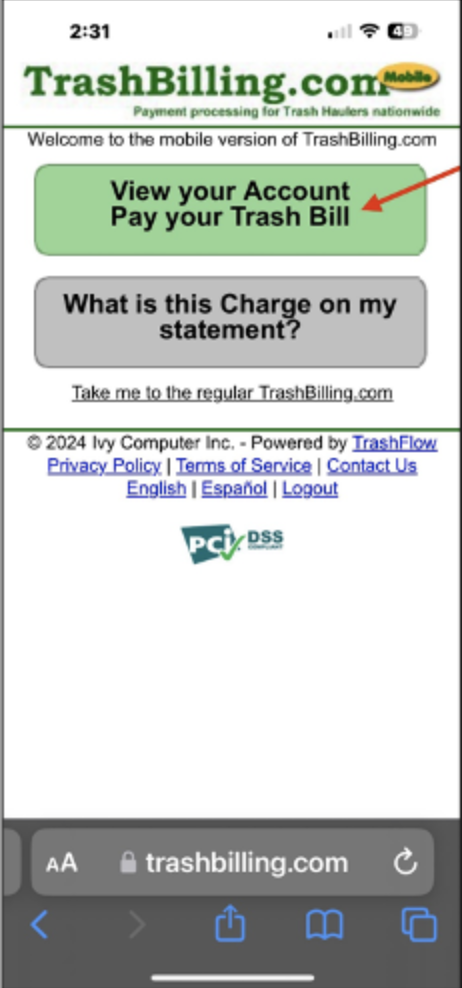
Click on the first button option - “View your Account/Pay your Trash Bill”.
Enter your unique web account number (12-digit number starting with 1088) located on your bill.
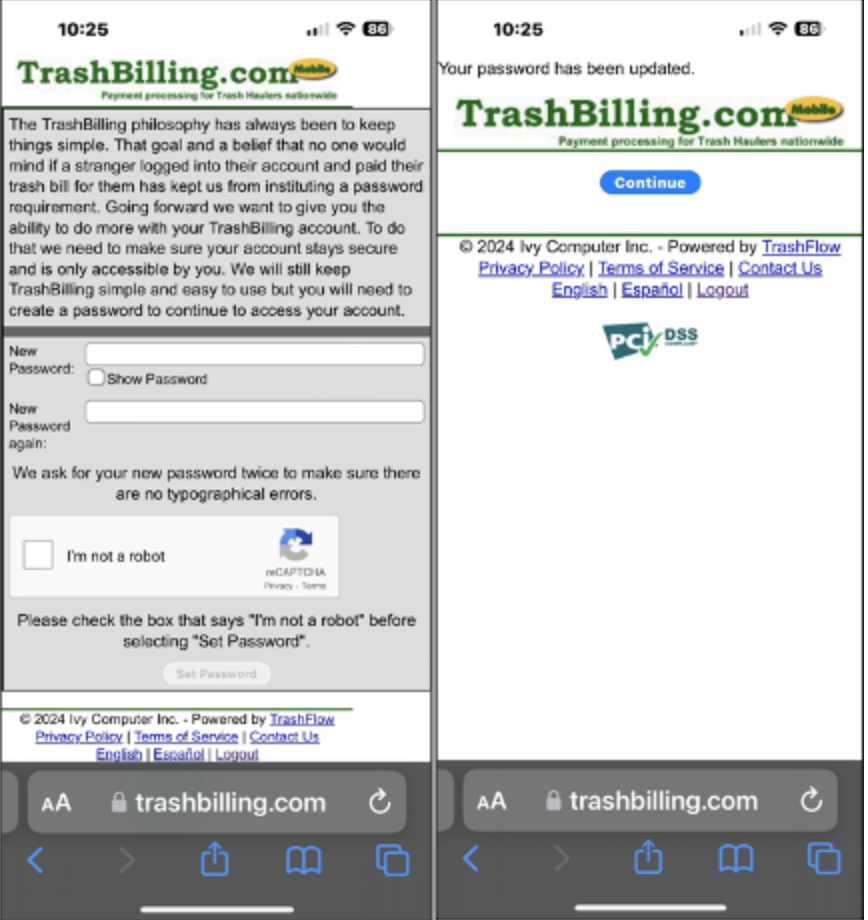
For first time users, please create a password (there are no specific password requirements, so it can be numbers, letters, or any combination). Then check, “I’m not a robot” and click “Set Password.”
On the next page, select, “Continue.”
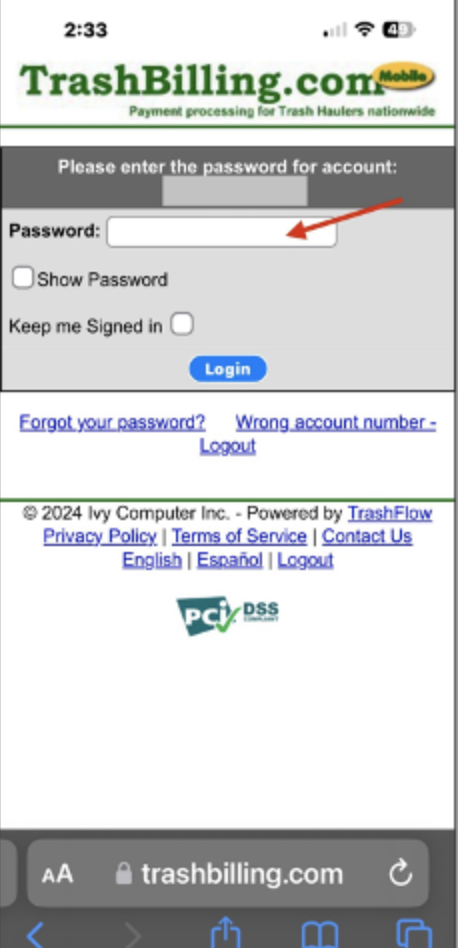
For returning users, please enter your password and select, “Login.”
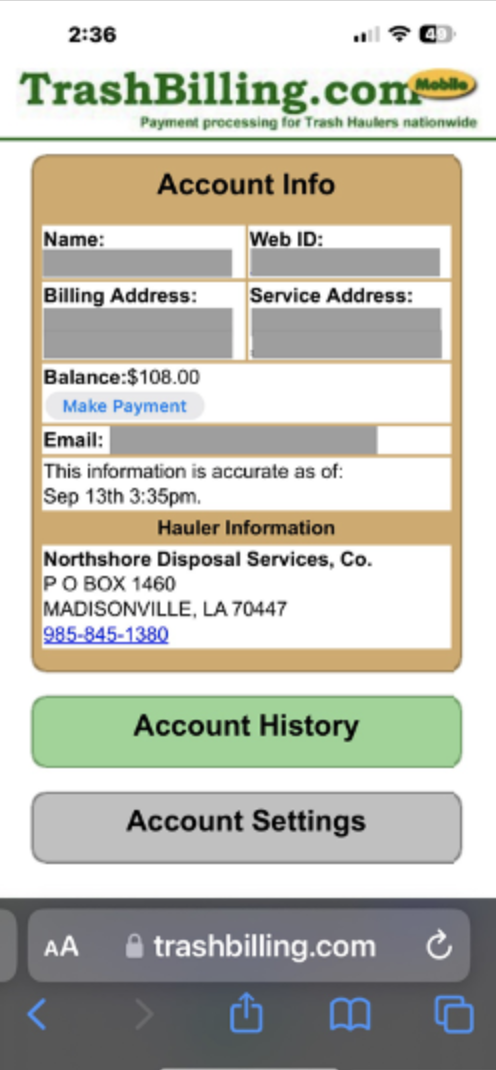
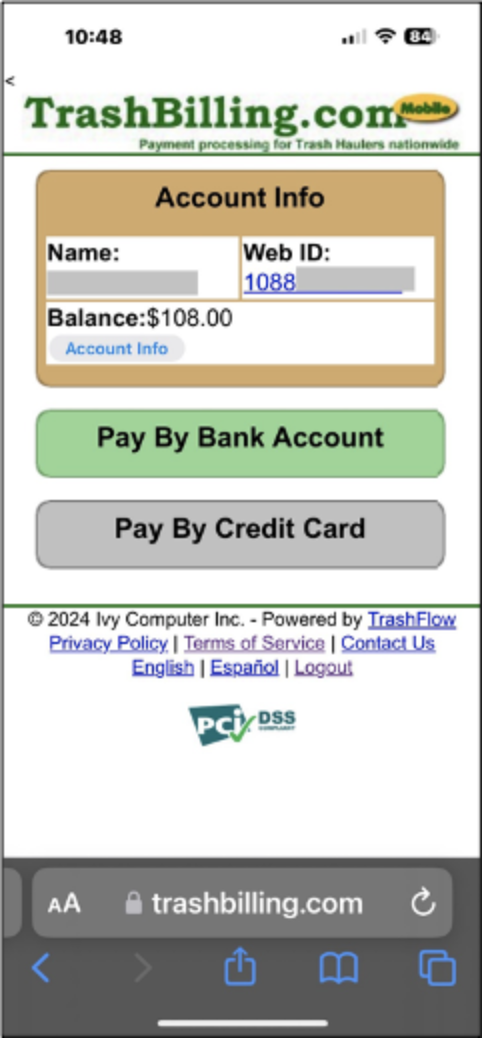
You’re in! On your home page, you will see all your account information under “Account Info.”
To make a payment on our account (and set up autopay), click on the “Make Payment” button located under the account balance.
Select whether you would like to “Pay By Bank Account” or “Pay By Credit Card.”
NOTE: There are NO fees for either one.
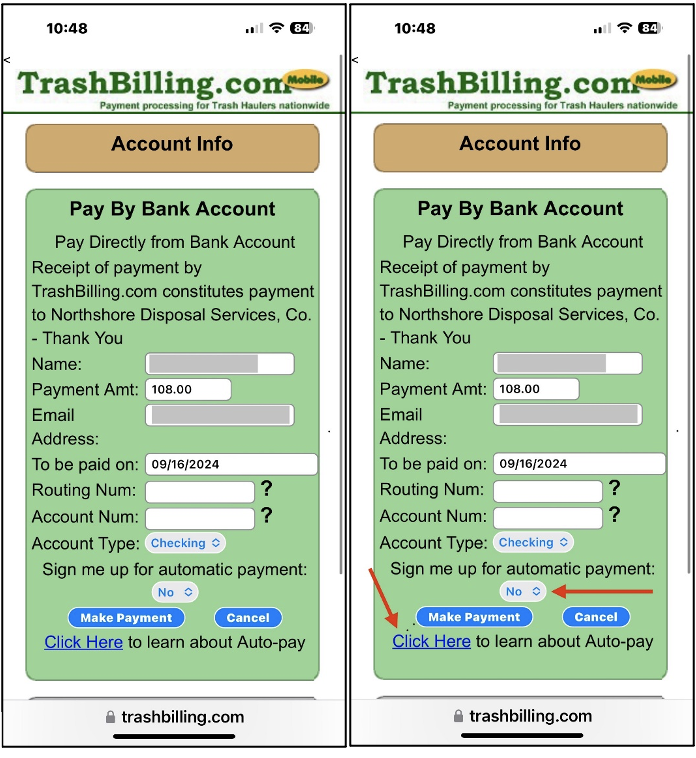
To make a payment using your bank account, fill in all the information listed on the payment screen. To sign up for autopay, select “Yes” from the automatic payment option.
NOTE: to learn more about autopay, select where it says, “Click Here” at the bottom of the page.
When you are ready to submit your payment, click on the button that says, “Make Payment.”
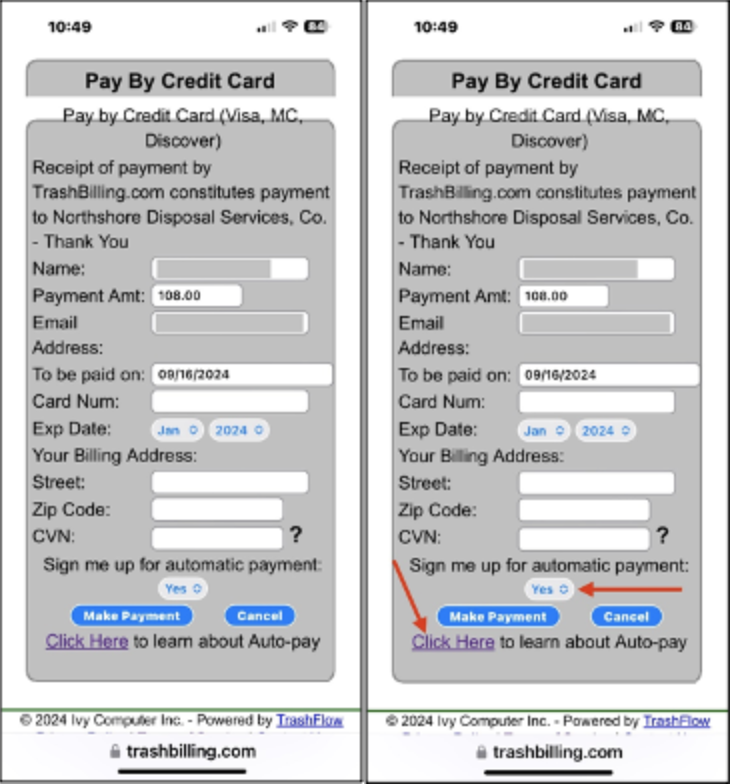
To make a payment using a debit or credit card, fill in all the information listed on the payment screen. To sign up for autopay, select “Yes” from the automatic payment option.
NOTE: to learn more about autopay, select where it says, “Click Here” at the bottom of the page.
When you are ready to submit your payment, click on the button that says, “Make Payment.”
Once your payment has been submitted, you will receive TWO emails from: [email protected]
The first email will tell you your payment has been received:
The second email will be your receipt for payment.
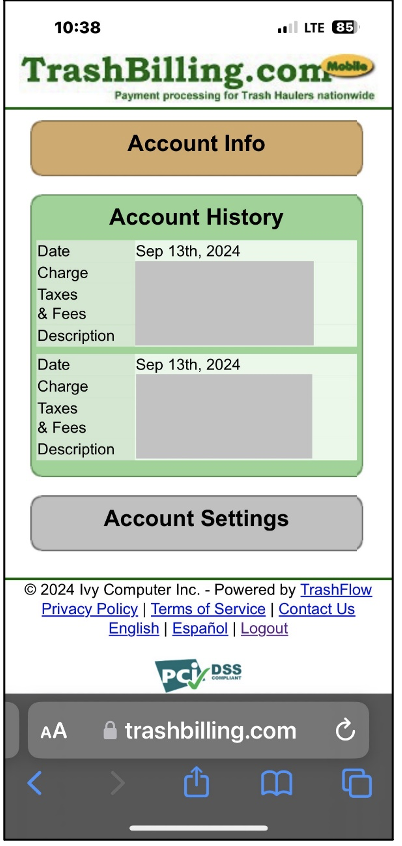
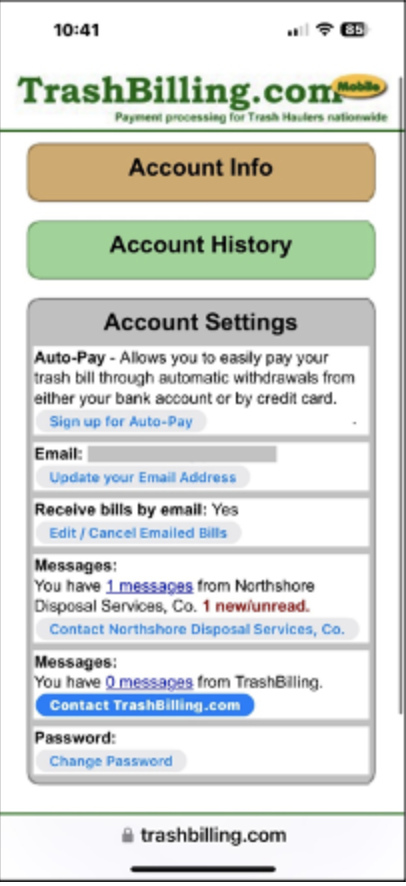
To view your most recent bill and up to 6 months of billing and payment history, click on the “Account History” from your home screen.
Under the “Account Settings” tab, you can sign up for auto-pay, update your email address on file, opt in for email billing, send a message to us and view messages sent by us, and change your password.
NOTE: If you sign up for autopay on this page, no payment will be processed at that time. This option is for future drafting ONLY.
